The Merge to Word button isn’t the only way to merge Access data into Word documents. In this article, Helen Feddema demonstrates several more flexible methods, useful for creating either single or multiple Word documents and filling them with Access data.
Access has a built-in Merge to Word command, located on the OfficeLinks button on the main toolbar. You can merge the contents of a table or a select query to a Word document using this command, but there are several problems with this method:
- Users must have a copy of Access, so the technology doesn’t work with applications delivered with the runtime engine. It uses DDE (it’s still not dead!), which is slower and less reliable than the newer Automation technology.
- Even if Word is open, a new instance of Word might be opened for the merge document, and a new instance of Access is always opened for the data source. This is a real memory hog.
- After closing the Word merge document, the new version of Access instance remains open until you close it manually.
- From time to time (and certainly if you move the Access database), you might have to manually reselect the Word merge document’s data source in the Mail Merge Helper dialog box.
- There’s no way to select just a few records for a merge on-the-fly; you have to select the records in advance, using a select query or a make-table query, and then merge the results.
However, mail merge is useful in some cases (at least if you have lots of memory and a fast processor); it’s especially useful in cases where you already have lots of Word merge documents, and you just need to create data sources to link them to. Mail merge might be the only option for processing large numbers of records to merge, where you couldn’t open that many separate Word documents.
Alternate methods
Even so, I rarely use mail merge; instead, I write Automation code using one of three alternate methods to place the Access data in Word documents:
- Word custom document properties
- TypeText method
- Word bookmarks
Whichever of these three methods you choose, you’ll have to create a Word template to define the documents that you’ll be generating (see the sidebar “Word Templates” for background on how to create Word templates).
Word custom document properties
This is the method that I use for creating letters or any other document that integrates Access data with existing text. With this technique, I use Automation code that creates a new document from a template for each Access record, and then fills the document’s custom document properties with data from an Access record. These custom properties are then displayed in merge fields embedded in the letter. Word custom document properties belong to individual documents, so data written to them from code is stored in the document itself, not in a separate data file. This has several advantages over mail merge:
- You don’t need a separate data source in a specific location to view the merged data in the document (a data source may be deleted, renamed, or moved, so you can’t see the merged data when you open the document).
- No instance of Access is opened when a document is opened, which saves memory. It also lets users who don’t have Access work with the documents.
- You can easily modify the merged data or letter text for individual letters.
- Each letter is a separate document, which makes them easier to file, print, or send by e-mail.
TypeText
This is the method I use for labels, cards, name badges, and other such documents where the only text is the material from my database. With this technique, I use two methods from the Word object model: MoveRight to move from cell to cell (where each cell is another label) and TypeText to enter data from an Access record to that cell. The resulting document is a plain text Word document, easy to modify as needed before printing.
Bookmarks
With all of these methods, either I create an initial template or my users do. All of these methods allow the user to modify the resulting document before printing it or sending it on. Where I have users who aren’t comfortable with using custom document properties, I use Word bookmarks. For most purposes, bookmarks work as well as custom document properties, with one exception: A single custom document property can be displayed in multiple fields in the document, while bookmarks can’t. Being able to print the same information in several places can be very useful (displaying the name and address in both a letter and an envelope, for example). When using bookmarks, I have to write the same information to multiple bookmarks to get the same result.
Using custom properties
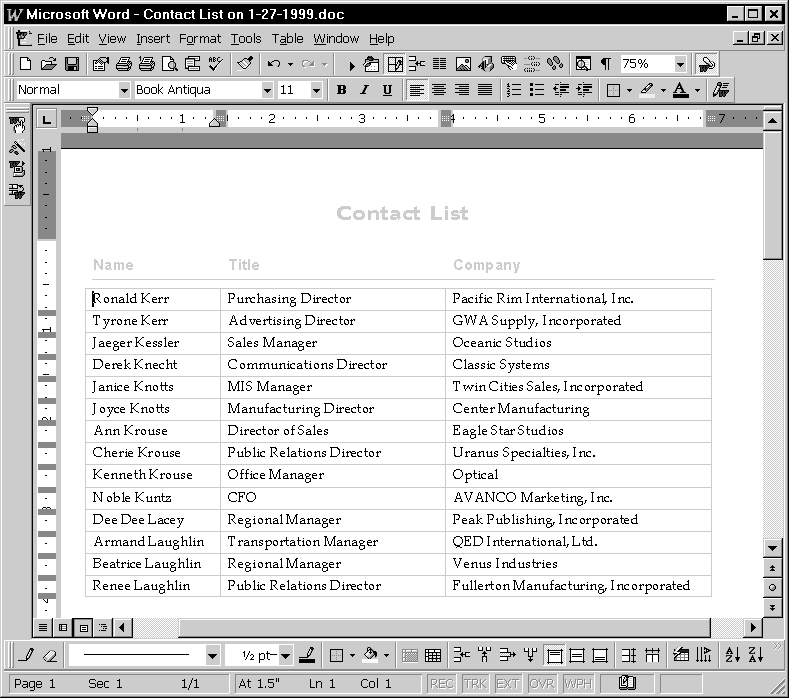
To demonstrate the four ways of merging data to Word (custom document properties, TypeText, bookmarks, and mail merge), I created a database with a table of typical name and address information (tblContacts), which you can find in the accompanying Download file. The database has a primary form to work with the contacts (fpriContacts), several other forms demonstrating the different merge techniques, and a form demonstrating the use of a multi-select list box.
For maximum convenience when merging the current contact’s data to a single Word letter, I placed a command button on the fpriContacts form. This button creates a Word letter for the current contact with a single click. After checking to see that the information has been entered into the form, the routine attempts to get a reference to an already running version of Word. Only if Word isn’t already loaded does the code start a new version:
On Error Resume Next

Set objWord = GetObject(, "Word.Application")

If Err.Number = 429 Then

  fIsWordRunning = False

  Set objWord = CreateObject("Word.Application")

  Err.Clear

Else

  fIsWordRunning = True

End If
Creating a new letter begins by specifying the full pathname to the template that controls the letter’s form. In this case, I need the path to Contact Letter DP.DOT, which is the template upon which I’ll base this letter. So the next thing I do is get the name of the template directory from Word and the Windows Registry:
strTemplatePath = _

  objWord.System.PrivateProfileString("", _

    "HKEY_CURRENT_USER\Software\Microsoft\" & _

    "Office\8.0\Common\FileNew\LocalTemplates", _

    "") & "\"

strWordTemplate = _

  strTemplatePath & "Contact Letter DP.dot"
With the complete path name to the template file built, I get a reference to Word’s document collection and add a new document, based on the template:
Set objDocs = objWord.Documents

objDocs.Add strWordTemplate
A similar technique retrieves the directory that Word is keeping its document files in and stores it in the variable strDocsPath. Rather than overwrite previously generated letters, I generate a new name for the file by adding an incremented number to the end of the name:
i = 2

intSaveNameFail = True

Do While intSaveNameFail

 strSaveNamePath = strDocsPath & strSaveName

 strTestFile = Nz(Dir(strSaveNamePath))

 If strTestFile = strSaveName Then

   intSaveNameFail = True

   strSaveName = "Letter " & CStr(i) & " to " & _

            Me![FirstName] & " " & Me![LastName]

   strSaveName = strSaveName & " on " & _

                    strShortDate & ".doc"

   strSaveNamePath = strDocsPath & strSaveName

   i = i + 1

 Else

   intSaveNameFail = False

 End If

Loop
Now that I’ve created my document, I can use the custom properties that the user has added to the document. First, I get a reference to the CustomDocumentProperties collection, and then I update each item in the collection with the appropriate value from my form. Here’s a sample of the code where I update the TodayDate and Name customer properties:
Set prps = _

  objWord.ActiveDocument.CustomDocumentProperties

prps.Item("TodayDate").Value = strLongDate

prps.Item("Name").Value = Nz(Me![FirstName] _

     & " " & Me![txtLastName])
With all of the customer properties updated, the real work is done. I select the whole document, use the Fields collection’s update method to refresh the fields associated with the custom properties, and save the result:
objWord.Selection.WholeStory

objWord.Selection.Fields.Update

objWord.ActiveDocument.SaveAs strSaveName
In this Automation code (and other similar code in the sample database), I use late binding. I use CreateObject to get a reference to Word, rather than New, and all Word objects are declared as Object. This means that I take a hit on performance, have no IntelliSense support during development, and have to use numeric values for arguments instead of Word’s predefined constants. However, it also enables my code to run even without having Word checked off in my References list, which makes my code a little more portable.
In Figure 1, you can see a Word letter generated with this technique. In the figure, the shaded areas indicate fields. The fields at the top of the document show the User Name and User Address from Word’s Tools | Options | User Information page, while the fields in the body are DocProperty merge fields displaying the contents of various custom document properties. You can see the field codes in Figure 2, which shows the same document after making field codes visible by pressing Alt-F9.
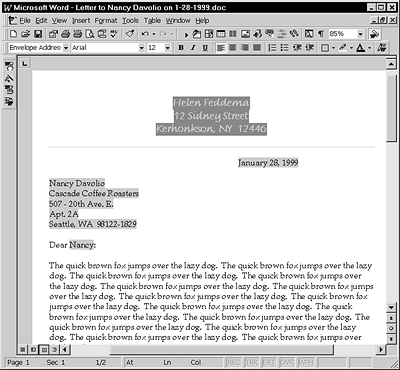
Figure 1
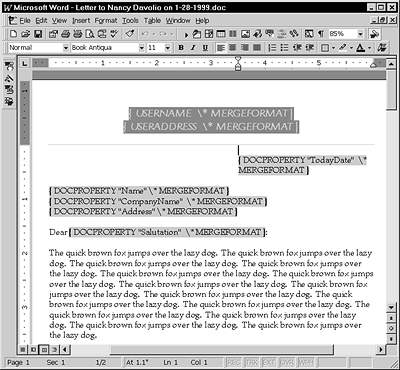
Figure 2
Using TypeText
If you create a label document from Word’s Envelopes and Labels Wizard, Word will use mail merge to link to a data source, such as an Access table, with the data appearing in a table in the Word document. While I might not use mail merge, a Word table is an excellent interface for creating labels, name badges, business cards, and other such documents. So, when creating these kinds of documents, I generally have my users start out by creating a Word Labels document. To make it easier for the Automation code to work with the table, I have them remove the narrow spacer columns that some of the label documents use. This ensures that using Word’s MoveRight method within a table will always move me to a new cell.
With a Word Labels document created, and saved as a template in the User Templates folder, I can write Access Automation code to generate the labels and fill them with data from Access. Since I want to be able to select multiple contacts for labels, I use a multi-select list box as the interface for selecting records. A multi-select list box lets users select as many contacts as desired, without having to set up criteria for selection. You’ll find an example in the sample database in the form frmListBoxContents.
The TypeText code starts out like the custom properties code by checking that the form is filled out correctly, getting a reference to Word, and retrieving the folders information. The code then goes on to pick up information about each selected contact from the list box. As you can see, I loop through the list box’s ItemsSelected collection, retrieving data from the columns in the list box. The following code gets the street address from column 5 and the city name from column 6 of the list box:
For Each varItem In lst.ItemsSelected

  strSteet = Nz(lst.Column(5, varItem))

  strCity = Nz(lst.Column(6, varItem))
Once I’ve retrieved the information, I insert it into the document using Word’s TypeText method. Here’s the code that inserts the name and address information (the address information is formed by concatenating together the street, city, and postal code columns from the list box):
objWord.Selection.TypeText Text:=strName

objWord.Selection.TypeParagraph

objWord.Selection.TypeText Text:=strAddress

objWord.Selection.TypeParagraph

objWord.Selection.MoveRight Unit:=wdCell
The TypeParagraph method does the equivalent of inserting a vbCRLF in VBA, or the old WordBasic InsertPara command–it starts each piece of information on a new line. After completing the address, the MoveRight command is used with the wdCell unit to move to the next cell in the table ready to enter the next label. If another cell doesn’t exist, Word will create one automatically. Finally, I save the completed document. Figure 3 shows a completed Avery #5161 labels document created by running this code.
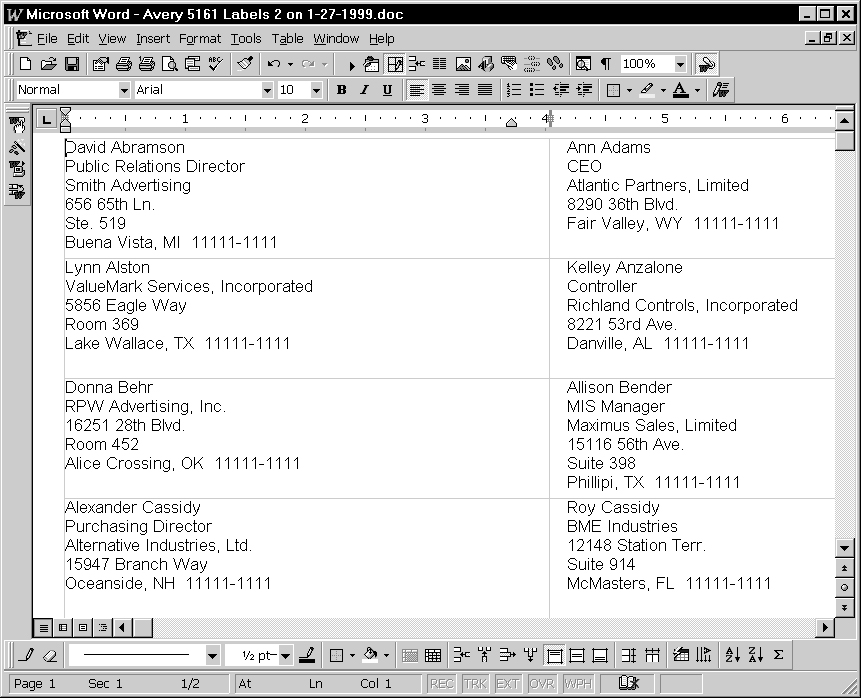
Figure 3
Using bookmarks
The code for creating multiple letters using bookmarks is similar to the code that uses custom document properties, except for the section that actually writes the data to the bookmarks. When using bookmarks, you must first navigate to the bookmark that you want, then use TypeText to add your information at that position in the document. Don’t be confused because this code uses Word’s Selection object: After adding a document, the whole document is selected. This code writes the name and company name information:
With objWord.Selection

.Goto What:=wdGoToBookmark, Name:="Name"

.TypeText Text:=strName

.Goto What:=wdGoToBookmark, Name:="CompanyName"

.TypeText Text:=strCompanyName

End With
The resulting letters are similar in appearance to the custom properties version, except that the name and address data are straight text in the document, rather than field code results.
Mail merge
The last form in the sample database, frmMailMerge, demonstrates using built-in DDE mail merge, using a table generated from a make-table query as the data source. One benefit of Word’s mail merge is that it automatically suppresses blank lines. If you look at my code, you’ll find that I had to write my code to ensure that I didn’t create any blank lines. For instance, while every contact person has a name, I couldn’t count on them having a job title. Had I put the job title on a separate line, then there would be a real possibility that I would end up with blank lines wherever a contact had no title. To prevent that, I concatenated job title to the contact name and treated them as one piece of information.
When you click on the Merge button in my sample database to start a mail merge, you’ll have a long wait before anything happens. This reflects the time it takes Windows to start another session of both Access and Word (if you look at the taskbar, you can see a new Access icon appear as the extra instance of Access is loaded). Figure 4 shows the catalog-type mail merge document generated by my sample code.
Figure 4
When using mail merge, you’re just responsible for loading the data, opening the template, and calling the merge routine. Since mail merge will only take data from a table, I have to transfer the data that I want to use in the merge from my form into a table. The routine, therefore, begins by deleting the data currently in the table that I’m going to use as the data source for the merge:
strTable = "tblMergeList"

strSQL = "DELETE tblMergeList.* FROM tblMergeList;"

DoCmd.SetWarnings False

DoCmd.RunSQL strSQL
I then create a recordset and load it with data that I’ve retrieved from the form:
Set dbs = CurrentDb

Set rst = dbs.OpenRecordset(strTable, dbOpenTable)

With rst

.AddNew

!Name = strName

!JobTitle = strJobTitle

!CompanyName = strCompanyName

!Address = strAddress

!Salutation = strSalutation

!TodayDate = strLongDate

.Update

End With
With my data source prepared, I access Word and open the template that I’ll use in my mail merge:
objWord.Documents.Add strWordTemplate
With the data source prepared and the template open, I call Word’s mail merge routine to create a new document:
With ActiveDocument.MailMerge

.Destination = 0

.Execute

End With
Finally, I save the new document and make Word visible so that the user can make any modifications that are desired:
objWord.ActiveDocument.SaveAs strSaveNamePath

objWord.Visible = True

objWord.Activate
There are pros and cons to saving the document after creating it. By creating a separate document (as I do in the code) in the future, the document can be opened without opening an instance of Access. On the other hand, the file is no longer a live merge document, and it won’t be updated as the data in my table changes. Saving the merge document itself guarantees that you’ll remain connected to the updated data. However, the user must have Access running on the computer where they open the document, the database must not be moved from its location at the time of the merge, and the user will have a long wait each time he or she opens the document, as the merge is effectively re-performed.
While it’s faster to use one of the other merge methods (custom properties, TypeText, bookmarks) to generate a small number of letters, mail merge to a single multi-page document can be faster when you have a large number of letters to generate. The sample database’s test data table (tblContacts) contains 500 contacts, so you can do your own timing tests to determine which method works best for you. I’ve provided the Contact Letter template in various versions (they differ only in having the appropriate fields or bookmarks to receive the merge data) to use as your output. Table 1 shows the locations where you should put the various files.
Table 1. Zip file install locations.
| Filename | Install to folder |
| Merge to Word.mdb | Any folder |
| Contact Letter DP.dot | Word user templates folder (usually C:\Program Files\Microsoft Office\Templates) |
| One-up Label DP.dot | Word user templates folder… |
| Avery 5160 Merge Labels.dot | Word user templates folder… |
| Contact Merge Letter.dot | Word user templates folder… |
| Contact List.dot | Word user templates folder… |
| Avery 5160 Labels.dot | Word user templates folder… |
| Avery 5161 Labels.dot | Word user templates folder… |
| Avery 5161 Merge Labels.dot | Word user templates folder… |
| Avery 5162 Merge Labels.dot | Word user templates folder… |
| Contact Letter BM.dot | Word user templates folder… |
| One-up Label BM.dot | Word user templates folder… |
My routines give the user the ability to modify the resulting documents by leaving Word open with the document displayed. You’ll probably have to use mail merge for really large numbers of contacts, since you’ll certainly run out of memory or system resources before you open 500 child windows in Word. If you don’t want to give your users the ability to modify the letter after it’s created, you might want to alter my code to close the document after saving it and leave Word hidden.
With this article, your arsenal of document management techniques should be significantly larger. You’re now in a position to try a variety of methods and pick the one that best suits your needs. While one of the problems with a tool as powerful as Access is that there are so many ways to do anything, it also means that an expert developer can pick the way that works best.
Sidebar: Foundation Concepts: Word Templates
All of the techniques that I discuss in this article depend upon Word templates. If you’re unfamiliar with how to create those templates, here’s a brief introduction.
- Custom Document Properties–Templates need to have the appropriate custom document properties set up. You create custom properties by opening the template file and going to the File | Properties menu choice. The Custom tab of the template’s properties sheet, shown in Figure 1a, lets you define your custom properties. You can’t create a blank custom document property manually; you must initialize each property with a value (for example, a number for numeric fields, a space for text fields, or a date for date fields). After creating your custom document properties, you must then insert DocProperty fields in the template document using the Insert | Field menu choice. You’ll find DocProperties fields in the Document Information category. Once you’ve selected DocProperties, clicking on the Option button will give you a list of available properties, including any custom properties that you’ve set up (see Figure 2a).

Figure 1a
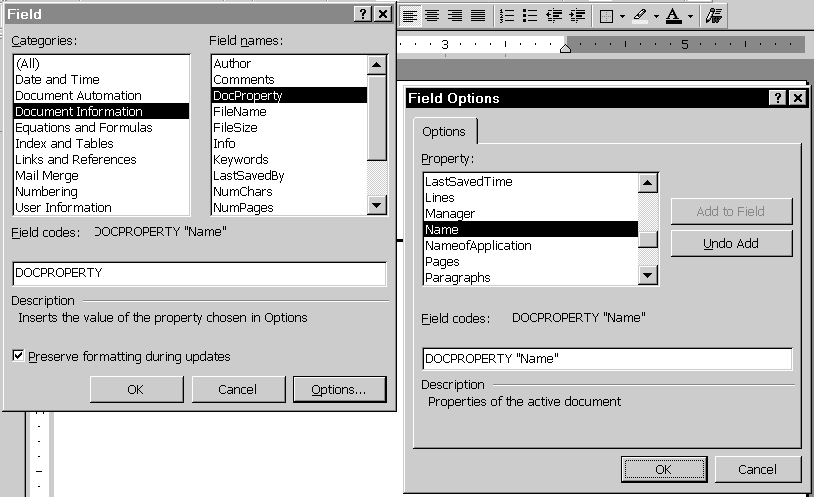
Figure 2a
- TypeText–Start by creating a Labels document for the appropriate card or label product, using the Word Labels and Envelopes Wizard from the Tools menu. If the resulting table has narrow separator columns between text columns, delete them and make the text columns wider by the same amount, to prevent problems when running the code.
- Bookmarks–Create bookmarks at appropriate places in the Word template as required by the program, using the Insert | Bookmark menu choice. Each Bookmark must be assigned a name, which you’ll use in your code.
- Mail merge–You can create a Word mail merge document and, from Word, link it to an Access table or query. Alternatively, you can start from Access by selecting a table or query and then clicking on the Merge to Word button from the OfficeLinks selection on the Access toolbar. After that, you can either create a new Word document or select an existing one. If you move your Access database later on, you’ll need to reselect the MDB file from the Mail Merge Helper dialog box in Word.

By Patricia Hartman October 28, 2022 - 2:00 pm
The download to this article does not download. Or if it does, I can’t find it.
https://vb123.com/four-ways-to-merge-to-word/#199911_HFmergeword_Download77230DCD